Showing posts with label paper. Show all posts

Tuesday, September 11, 2012

Snowmen from 2011

Another catchup post from the best of last year's projects!

Tissue Paper Snowmen


Paper plate snowmen


Thursday, September 29, 2011

Self portraits with paper

The luxury of having a new batch of kindergarteners who have not taken art from me before, is that I get to revisit "ye olde arte projects of the past." Having taught for three years now, I have quite a few that I would repeat and this is one of them!

Here is a link to the project from 2 years ago!

No matter how simple or complex, it is amazing how distinctive and representative some simple cut and torn pieces of construction paper can be. Even Kinders can make their self portrait portray themselves.


I have the kids pick background color and then some skin and hair color. They cut the face as a circle (or close) and then they can tear bits for hair. Add some eyes, nice mouth etc...

Wednesday, May 25, 2011

Greek vases


The 5th/6th grade was studying Greece, so I themed several art classes for them. This one involved the beautiful clay pots and vases (amphora) that the Greeks decorated with red and black graphic shapes and figures.

This allowed me to continue a theme of bold graphic elements in art as well as symmetry. I gave them a brief overview of the different shapes the Greeks used. The nitty gritty about the uses was not that important, but I did want them to get a feel for the diversity of shapes and hopefully inspire them to think creatively with their shapes.


Then I gave them orange paper and had them fold it in half so that when they cut it would be a complete vase shape.

 Next I gave them a brief overview of the different athletes and gods that decorated these vessels. Of course most greek athletes are a a tiny bit underdressed, which let to the expected tittering amongst the crowd.  Once the giggling settled down, I tried to get them to see that these ancient drawings were pretty basic.  Almost all the different shpes were carrot-like. Legs, arms, fingers...all different elongated ovals.

Gustav Klimt people

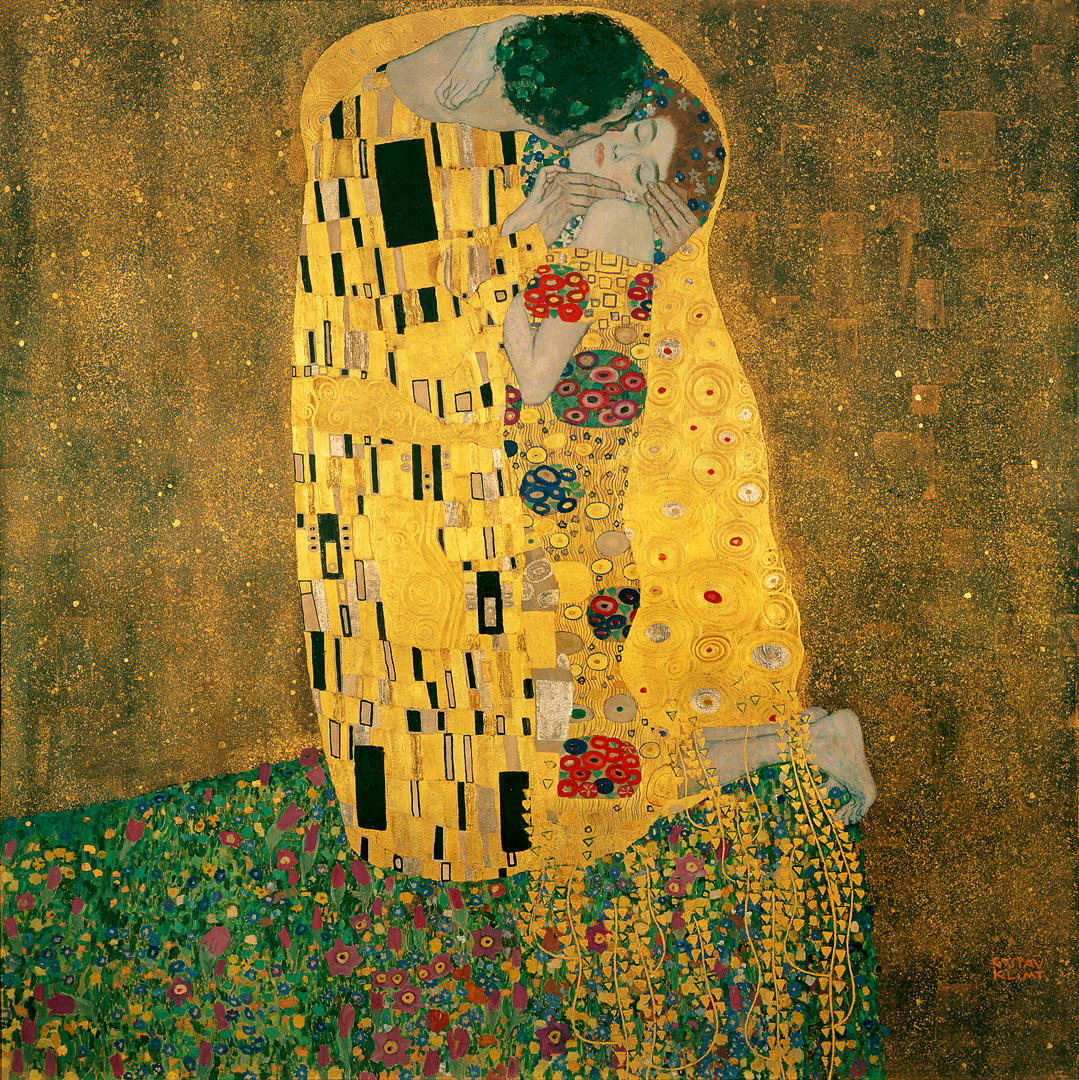
I use famous artists as a gateway into a weekly art lesson frequently. This week was Gustav Klimt, a turn of the century Austrian artist most famous for his highly decorative paintings/collage of people, especially using vibrant abstract patterns and backgrounds.
You may know his "The Kiss"

To translate this into soemthing that the kids could do in 30 minutes, I had them start with yellow paper, but this would be beautiful on gold paper or with gold paint.

I also had them choose a face or body from a fashion magazine as a starting point, since many of Klimt's paitings have a realistic looking head/torso and then he explodes witha  riot of color and pattern. They glued this scrap on the paper.

Then they drew the body, or at least a suggestion of body/torso with flowing lines and lots of pattern. This was an interesting example of realism meets abstract art.


Sunday, May 1, 2011

Star Wars Collage

For those Star Wars fans in my art classes. This is for you!


Jeremy Messersmith - Tatooine from Eric Power on Vimeo.

Week 17: Valentines


The age-old question of what to do for Valentines Day? So many fun crafty things. This year I had the kids do "snowflake" Valentine compositions in paper. They choice a couple red, pink, white etc sheets and folded them like you would a snowflake and then cut out heart shapes. If they were lucky they would get some fun inticate shapes. If not, they would at least have 8 hearts on the table that they then could still use to make a collage. I tried to get them to layer larger pieces under and smaller on top.

Thursday, February 24, 2011

Week 15-16: African Kente Cloth


As a project for the school's annual International Luncheon, they study a region...this year was Africa. Parents prepare African food and they spent a month or more studying it.

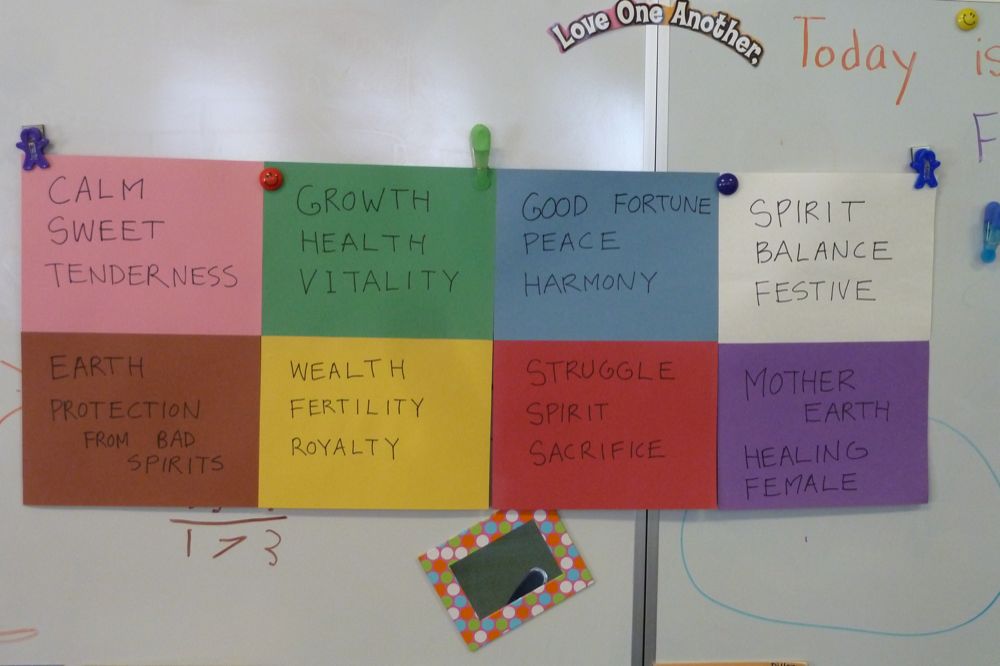
For art, we did "kente cloth" placemats. Kente cloth is a Central African specialty and uses strips of intricately woven cloth in bright colors. It is a ceremonial cloth and well known outside of Africa. Each color has a meaning.

To do this with paper, I used a large brown paper that they folded and then cut slits so it resembled a comb. Use a ruler for spacing.  Your goal is to ufold the paper and have it look like a venetain blind but stay in one piece.  Then you take 2-3 other colors and cut strip with a ruler. Decorate this strips with a geometric pattern.

Alternating colors, weave the colored strips into the brown paper. When this all done, you can also decorate the brown parts as well. The finishing touch was "laminating" this with contact paper.


Week 13: Optical illusion 'Op' art

The first art class of the New Year was a departure from the Christmas crafts!  Black and white optical illusion Op Art. I told the kids about the late 20th century artists who created these very geometric, often monochromatic pieces.
We used a rule to find the center of a page of paper. Then I had them draw radiating line outward from that center.  Connecting the lines with spider-web-like lines. The most visually interesting onces alternated curving lines so that it almost looks like rippling cloth.

Then they colored every other area black like a warped checkerboard.  The kids seemed to enjoy the meditative challenge! Even the younger kids did a good job.