Wednesday, April 17, 2013

Tangrams

This was a fun project that our other teachers did with the kids on a "Fun Friday." The results were too cute and artistic to not post here as well. Lots of fun combos of triangles!


Monday, March 18, 2013

Warhol Zig Zag portraits


This project was kind of a three-in-one lesson

  1. self portrait with pencil
  2. color theory
  3. Pop Art/optical illusion

I was inspired by projects that I have seen that involve doing two similar but opposite drawings and then slicing them and putting them on accordian-folded paper.

I told the kids about Andy Warhol and his many technicolor portraits of celebrities. I also walked them thru drawing a face. We had already done an eye earlier in the year. The next step was to photocopy their pencil drawing, so they would have identical copies, and also not ruin their nice pencil drawing.


Once they had the two faces, they used colored markers to color the different parts of the face. My goal was to have complimentary colors like green/red hair, blue/orange skin, purple/yellow eyes. Then they had to fold/cut their portraits into 4 vertical strips, and alternate them on a larger piece of paper that could be accordian folded.


Friday, March 15, 2013

Celtic Crosses 2013

In a repeat of a project I did 2 years ago, I had the K-1 group make crosses for St. Patrick's Day. Tinfoil, pencils to emboss with, paint and some construction paper. The main concepts are pattern, and how to use paint to "antique" the metal. Fun and simple.

Kinder Bees


Being that its springtime now, and the kids have been learning about insects, I had the idea to do bees with the little kids.

This was a fun multi-step project that turned out great. I did explain a bit about the parts of a bee, and they used paper, paint, and some foam packing material for the wings.


 I'm always amazed at how much personality the kids can put into their art. It is always much more charming and evocative than the sample I show them!

Color Value landscapes


This project turned out better than I hoped. A few weeks ago, I had the kids paint 4 sheets of paper with dark-light versions of a color. Most people chose purple, blue or green. Those had to dry, so we picked it up a couple weeks later.


This lesson involved both color value and the idea of perspective and how distant objects are usually less complex looking and lighter. The kids had to layer their painted papers from light at the top to dark at the bottom. The way they chose to cut and overlap also had to attempt to get sharper and more complex shapes in the foreground and softer shapes in the background.


Sunday, February 10, 2013

Stained Glass Europe Study


As I mentioned in my previous post, I am doing "stained glass" with all the kids for our European International study.

Before the lesson, I showed them this clip from Sister Wendy. It explained  briefly about some English stained glass and tidbit of history.


The first step was to get clear plastic/acetate (report covers and sheet protectors work great for letter sized-but for larger ones I used large sheets of 5mil plastic from TAP)

I mixed up some white glue and water and then had the kids arrange small scraps of tissue paper on the plastic and really make sure that the paper was nice and wet and gluey. I let these dry, and made some black card-stock frames. Final touch was black sharpie marker to outline shapes and other details.


Friday, February 1, 2013

Studying Europe

Every year, the school picks a geographic theme for their International Study. This year it is Europe (it usually is a  continent or general area of the world)  I try to do some art lessons that cater to that theme and also provide decoration for the annual "International Luncheon" where the parents bring in food from that region and they have a  celebration.

For European art I did several things:


The younger kids make paper Dala Horse from Sweden. This was to emphasize, cutting, pasting and decorating. The real horses are wooden sculptures, but these were made from red and yellow tagboard, cut and then decorated in a  folk art style.

The 2-4 grade did "coats of arms" shield that they made using elements that meant something to them or told a story. I told them about heraldry and the meanings of certain colors, shapes and symbols. They did this on paper bag paper to make them look old.


All the kids did "stained glass" which is a traditional European church/castle art form. We watched a quick Sister Wendy video on stained glass history and then the kids used tissue paper and white glue to collage the colors onto clear sheets of acetate. We will fame them in black tagboard in gothic and romanesque window shapes.

Christmas Art 2012


It seems like the whole month of November and into December was devoted to Christmas ornaments and decor that got used for the Holiday Home tour decorating the school. Here's a roundup of those items:

 Popsicle stick snowflakes got mentioned in an earlier post. Smaller versions of these got painted white and placed on the Christmas Tree.

 The K-2 class made the old standby of paper plate snowmen. Always a fun project. They decorated the school lobby.

 We also made handprint Santas with red, white and beige paint, decorated with some buttons and cotton.

 The younger kids used popsicle sticks to make triangles that we turned into Christmas Tree frames for a photo. Super easy, but fun!

Tuesday, November 13, 2012

Snowflakes from popsicle sticks


Getting ready for Christmas already! In fact this project will be decoration for our Holiday Home Tour which benefits the school. We have 6 homes decorated and the school itself. So if you like home tours buy your tickets here!

 On to the snowflakes...This is a multi-stage project and the first step was having the kids construct snowflakes from popsicle sticks..lots of them. I had them use white glue since it allows for them to adjust the design, eventhough it does not dry as fast as hot glue. The fun part has been to see how different the kids approach this concept. In the end there will be K-6th snowflakes, and all grade levels can do this.

After all the snowflakes dried, I spray painted them red. This is  step best done by adults. Smaller snowflakes, I painted white and the kids will glitter them for the Christmas Tree.

We just put them up in the high walls of the School lobby and they really add a graphic punch and some kid-art quirkiness. Love them!


Thursday, November 8, 2012

Sunflower Preschool


 Pleasant Hill Christian Welcomes Sunflower Preschool to its newly renovated portable. The PHCS kids have done some wonderful sunflower art over the years and I put a selection of that on banners to welcome the new kids and brighten up the building. Have fun!


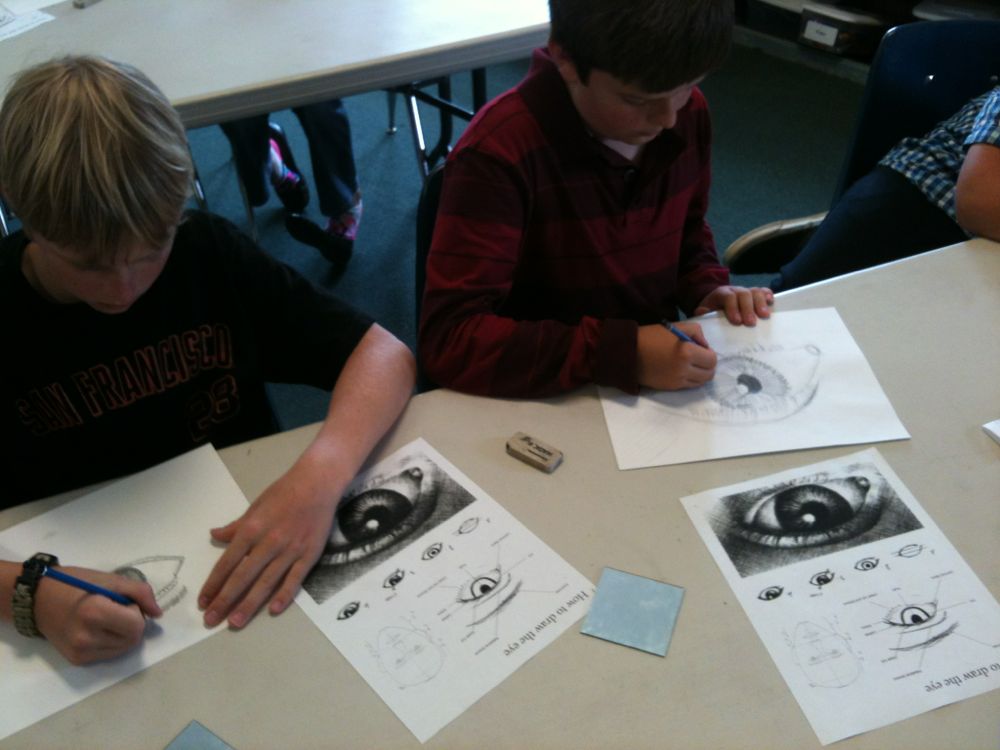
Drawing the Eye


With the older kids, we did an exercise in drawing the eye. They used pencil, and the goal was to breakdown the parts of the eye and try to draw what they saw in the mirror and not what they think an eye looks like...paying special attention to shading, shape and light/dark.